How to Track Successful Gravity Forms Submissions with Google Tag Manager
No more annoying false submissions.
Tracking form submissions can be a critical part of analyzing your website’s data. Especially if the success of your website is based off of form submissions as opposed to direct E-commerce sales. Many WordPress users use Gravity Forms to help them create forms for their website. Unfortunately, Gravity Forms makes it challenging to track form submissions with Google Tag Manager (GTM) without getting back false positives (ie. when someone just clicks the submit button, but does not actually submit the form.)
Lucky for you, we’ve figured out how you can track only the successful submissions, and then send that information to Google Analytics (GA), or wherever you’d like. How does this work? Well, basically we add some Javascript code to the confirmation of your form that pushes an object into the data layer. We can then use that object to trigger a GTM tag. Because the confirmation only displays after a form has been successfully submitted, you’ll no longer get back any false positives. Exciting right? Let’s get started!

Before we begin, we have to say thanks to Notes On Click for providing us with the Javascript code we used to solve this problem. You can check out their instructions here. Also if you’re new to using GTM and GA, make sure to check out the difference between Google Tag Manager and Google Analytics as well to learn more.
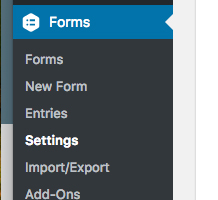
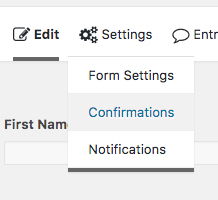
To start, open up Gravity Forms from the Dashboard of your WordPress website. From there, select the form that you want to track and then get into its confirmation settings and open up the default confirmation.
This is where the Javascript comes in. Make sure you’re in Text mode and not Visual mode, and then paste the below code underneath any confirmation message that’s already there. Also make sure that the “Disable Auto-formatting” box is checked in the lower left corner.
See the Pen Gravity Forms Successful Form Submission by Holly (@hollybattle) on CodePen.
If you’re familiar with Javascript, you can see that this code is doing a couple of things. It’s determining whether or not the confirmation has been loaded, how it’s been loaded, and then pushing a formID of “gform.submit.success” into the data layer. What’s awesome about this is that we now have a way of sending information to Google Analytics only when a form has been submitted successfully. Now all we have to do is set up a GTM Tag and Trigger to do this.
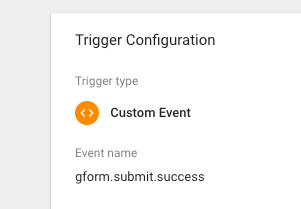
To do this, open up a new Google Analytics Event tag in GTM. Fill out the tracking parameters with whatever you like, and make sure to add your GA Tracking ID. Next, create a new Custom Event Trigger and link it to the Tag you just created. For Event Name, enter gform.submit.success and then set up when you want this trigger to fire.
You’ll likely want to create separate Tags and Triggers for each form on your website to make it easy to determine which form has been submitted in your Analytics. And that’s it! Make sure to verify that all of your tags are working correctly and sending data to Analytics. You can now get all of that beautiful form submission data and rest assured that there are no false positives. Congratulations!